Repair old tote bag


Old tote repair project.

WHY need repair on this old tote (created on May 2017)

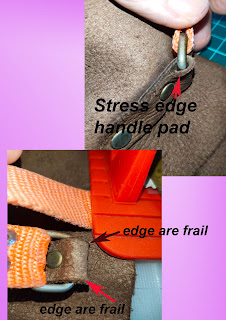
1.       Handle pad on other three is slowly showing sign of worn out (sign are the edge are frail and weak point)

2.       There is one minor error on one side of web sling is not correct position and orientation,

3.       Worn off on web strap end, redo the web strap expose end by use lighter to melt and reinforce it,

4.       All handle pad need to reinforce with additional layer where the D ring surface meet the inner leather surface.

5.       The old design on handle pad using rivet to hold and the “pulling stress” position is not optimize. Very obvious when remove old pad and notice leather surface is uneven and stretching pattern.

6.       Add on pocket on one side is done ad hod and too big a design and other factor like intended purpose is lacking.

7.       Not sure if this due to wear and tear or other factor cause the leather to get “soften” and the bag just sit flat (like collapse posture) when place down. Hence add a top edge strip with seam with nylon cord as backbone for support both front and rear.

8.       Numerous stitching error or lack of experience on saddle stitching resulted on uneven stitch thread for tote bag.


Refer to item #8


Refer to item # 7


Refer to item# 1


Work in progress.. thank you


Update on 27th Feb 2022


Remove handle pad and notice certain area is highly stress and frail part.

New handle include an interface material to reduce stress area.


Step to remove old thread from bag.

Try use tweezers to force out the thread , notice the black thread is for inner pocket.

Overall bag view after remove the thread.

Notice the EA foam was loosen on certain spot, re glue it to base leather.


Remove rivet from handle pad.

Create new handle pad 

New handle pad with new shape.


Only skive certain part of project, do take note added new layer of interface material on center section.


Showing how skiving was done.


Note and tip :- before use the project leather it is better to run a trail run with scrap leather to verify the correct thickness to skive.


For this skiving the final part still needs to trim the edge excess part. Use a knife or scissor to trim the edge.

The reason for not skive the center section is to ensure sufficient support with interface material

This is one way to pre punch hole on handle pad and the inner support pad


Tips on how to apply glue to a small nylon cord.

This technique allow the round cord to hold in position and easier to apply glue on it surface

Use a big table top surface to do stitching on seam.


This is the process to prepare for adding the handle pad and supporting pad to attached handle strap.
Do take the handle pad and supporting pad are temporary attached with double sided tape and pre punch stitching hole.

Once confirm position and location the handle pad is punch hole with awl.
After alignment on pre punch hole between handle pad and supporting pad. Temporary hold both pad with thread, this is one way to align and match the pre punch hole between both pad.

Work in progress.. keep watching for more...


Update 6th March 2022


Inner pocket design attached inside tote bag.

One of the top edge have pipe to give support for the soft lining material.


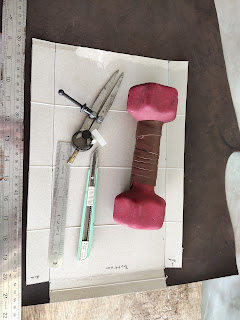
Cut material with tools


Add a divider pocket using the previous materials.
Depth of about 26 cm. and width to fit current tote bag width about 45 cm not include for side seam of 1 cm.

Have slight extra width for the inner pocket of 1 cm to create a bigger space.


Hand holding the layer of inner pocket with extra seam of 1 cm added.

The other divider layer is the recycle pocket material.

The bottom layer is with top edge wrap with nylon cord as part of piping.


This is one way to fold corner and sew the edge to take into consideration it is slightly wider length.


Cut both side layer use paper tempate.


After cut new side layer and stitch the bottom edge in this case.

Note:- edge seam is folded and punch hole. 

To know where to punch 1st hole, need additional care to check on the first punch hole align to old punch hole.
Hence take additional step to re confirm for both side 
(the right side and left side).

Note and tips, it better to pre punch holes on all three side edge before start stitching work.


Tips, after checking position and alignment between both end of side layer. 
Before start stitching work it better to hold the one end point with temporary stitching.
Since the tote bag leather might have certain wear and tear. 
This might result in the previous punch hole might run off position.

Another point is, with one end anchor in position temporary thread will make easier to start stitching the bottom edge to new side layer.


Place work piece on flat table to make work more relaxing and smooth flow. As the project is too big for stitching pony.


Prepare thread by start thread from bottom about 6 stitching point away and work from bottom to corner of front/rear layer.

Tips:- it help to enforce and allow greater strength to support stitching from bottom corner to the top of the front/rear layer seam edge.

Tips:- 
1) use clip to hold the two layer together. 
2) Use external box for support to project during stitching/
3) Another way is to temporary hold the top corner with temporary thread.

Do note this side did not have additional layer for pocket. Hence only two layer and straight forward stitching.


How to reinforce the corner.


Use awl to punch hole for stitching corner.


One technique for this stitching on project. Take note both needle at facing opposite side to each other. On same punch hole with two layer.

It take time to insert both needle and need additional time to slowly align and position needle.

Reason for doing this is to minimize thread punch thru other thread and this result in poor stitching outlook.


One way to hold the project in position in aid to stitching work.

Use a card board with paper clip to hold project up right. Also use another clip to hold both layer in position.


Slowly insert both needle thru same punch hole to stitch project.

The other needle is a temporary thread and needle to hold the top edge together.


Do take note the inner pocket is stitch to body with a thin thread to hold it in position. This is to minimize movement when stitching the side layer.

In this case there is three layer, 1. Front/ Rear 2. Inner pocket and 3) side layer.


First the awl tip is use to align the pre punch hole from outside facing. 
Once the tip of awl is noted the needle is to follow the tip of awl as it is slowly remove. This is one way to stitch.


Take note the awl tip is slowly remove and the needle tip follow the awl.
This is done from bottom work up to the top edge.


This is to show one way to minimize the piecing thru the thread as the layer is thick and the outer layer is pre punch hole. As the inner pocket is black in colour make it difficult to see the hole position.


For the corner stitching work. This corner need to reinforce by cross over corner stitching. 


Update on 8th March 2022


Close up view on corner stitching.


Cut leather material in preparation for handle support.

Pre-punch stitching hole


Wrap leather over handle strap.


Apply cross stitch pattern for handle wrap.


Close up view on cross stitching method.

Do take note the thread length to cut is about 6 times.

     Since use this cross stitch require more than normal straight stitching hence need additional thread length.


     Project done.


=  = - - - - =  =   =  = - - - =  = - - - - =  =   =  = - - - =  = - - - - =  =

* Note: This is trail use of "Google Translate" application from ENGLISH to JAPANESE, sorry if this translation do not make sense or suitable word or sentence, please do let me know and thank you.

* 注: これは英語から日本語への「Google 翻訳」アプリケーションの試用です。この翻訳が意味をなさない、または適切な単語や文でない場合は、申し訳ありませんが、お知らせください。ありがとうございます。

                                          👦    End of  document   👴


                                      👷  End of document 👴


Tobacco cigar holder 01 - タバコシガーホルダー01

 Tobacco cigar holder

Do a trail design for new cigar holder for a friend.


タバコシガーホルダー

友人のために新しいシガーホルダーのトレイルデザインを行います。


The original design is just a cross piece, base on feedback from end user it slightly difficult to retrieve a cigar from holder.

The original design have a deep "V" shape and it height is too high relatively to the V valley which make not so user friendlier design .

Hence re design the overall project to be smaller in size and add a thin layer to raise the height and make it easier to retrieve a cigar.


オリジナルのデザインはただのクロスピースで、エンドユーザーからのフィードバックに基づいて、ホルダーから葉巻を取り出すのが少し難しいです。

オリジナルのデザインは深いV字型で、V谷に対して高さが高すぎるため、あまり使いやすいデザインではありません。

したがって、プロジェクト全体のサイズを小さくし、薄い層を追加して高さを上げ、葉巻を取り出しやすくするように再設計します。


Cigar stand without the middle layer, photo provided with courtesy of end user. It also request to reduce height from current 6 cm...

User share issue with this design.


中間層のないシガースタンド、写真はエンドユーザーのご厚意により提供。 高さも現状から6センチ下げるよう要求されている…。

この設計でのユーザー共有の問題。


Another angle of view.


別の画角。


Drawing on project.


プロジェクトに基づいて描画します。


On top image is to verify the middle slot opening match each other.


The bottom image is the middle layer cut to size 4.5 cm x 5 cm with line drawn in preparation to punch hole with pickling iron.

This is to help to align pickling iron hole when attached to X piece.


The real challenges is to cut a slot straight line in the mid section. 

As this leather is tough and heavy material (buffalo hide) which poses challenges to cut them clean , straight and perpendicular.

Even after several attempt to sharpen cutting tools before use. Try other alternative cutting method but still need to improve. 


本当の課題は、中間セクションで直線でスロットを切ることです。

この革は丈夫で重い素材 (バッファロー皮) であるため、きれいに真っ直ぐに垂直にカットするのが困難です。

使用前に刃物を研ぐことを何度か試みた後でも。 他の代替切断方法を試してみますが、まだ改善の必要があります。


To make thing easier I have use a white pencil to mark the prickling iron punch mark. As the hole mark are not so easy to distinguish over time.

作業を簡単にするために、白い鉛筆を使用して、チクチクする鉄のパンチマークをマークしました。 穴跡は時間が経つと目立ちにくくなります。


As shown the line are mark on the inner side, due to the outer side is not even and difficulty to punch hole with prickling iron.

図のように内側に線が入っていますが、これは外側が平らではなく、トゲゴテで穴を開けるのが難しいためです。


This is to shows tools use for punch hole on project.

Tips:- at the bottom right is a tin of wax mixture to dip the prickling iron tips before punching hole.

This is help ease removal of the prickling iron tools from project.

これは、プロジェクトのパンチ穴に使用するツールを表示するためです。

ヒント: - 右下には、穴を開ける前にチクチクするアイロンの先端を浸すためのワックス混合物の缶があります。

これは、プロジェクトからチクチクする鉄製のツールを簡単に取り除くのに役立ちます。


Use a stitching pony when stitching project.

In this case, a gap between edge of X cross and middle layer edge is about 7 mm.

プロジェクトをステッチする場合は、ステッチ ポニーを使用します。

この場合、Xクロスのエッジと中層エッジとの隙間は約7mmとなります。


Update 12th March 2022

Add dye to edge of curve layer on project. As try out new dye type on leather work. 
This dye is use for fabric material.
Since the edge of this curve layer is "expose" and try this dye out on area.2022 年 3 月 12 日更新

プロジェクト上のカーブレイヤーのエッジに染料を追加します。 革製品に新しい染料の種類を試してみてください。
布地素材に使用される染料です。
このカーブレイヤーのエッジは「露出」しているので、この染料をエリア上で試してみてください。


See arrow pointing to edge that need dye apply to it.


染料を適用する必要があるエッジを指す矢印を参照してください。


Can see the difference with and without dye for edge.

Use a sharp pointed awl as dye applicator.

コバの染料ありとなしの違いが分かります。

染料の塗布には鋭利な尖錐を使用してください。


                   End of document 👴  文書の終わり


Repair Shoe of spouse

    This is a shoe / slipper repair for both slight wear and tear at heel area ( mainly the worn off is at the edge of heel) . 

The brand name of shoe is "Good Arch" manufacture is Taiwan, size 38.


Nail is used to minimize the repair layer from moving. As the area of coverage is very small.
Trim the edge to match the contour.

Compare before and after repair.


After repair try polish the shoe with a chemical liquid.

KENDA FARBEN chemical products for shoes. Starlux. bright finish for open grain leathers. made in Italy.


= * = * = * = * = * = * = * = * = * = * = * = * = * = * = * = * = * = * = * = * = * = * =


Right side of slipper with strap loosen, can see glue mark

Use a punch for marking position to punch with awl tool. Not recommend to use punch tool as the material is not leather material and it looks like sponge material.
Use awl to punch hole thru and needle follows the direction.

This is one way to start tie knot.


Repair done, take note of the thread stitch path.


   👷  End of document 👴

Non Leather Project # 9 (Trolley Handle Wrap)

 Non Leather Project # 9 (Trolley Handle Wrap)

A friend fold able trolley was available to try out a project using leather of 2.0 mm thickness to wrap around the handle. Prefer a rough surface for better grip surface , user friendlier design and ergonomically.

In this case try out two separate wrap around on same handle of trolley. Since most of the time our hand grip a certain part of the handle hence decided to have two separate wrap material.


Overall view of this project before and after.

Cut a leather of size 15 cm (width) and 8.8 cm (depend on diameter of handle). 


One quick way to verify and check is use a scrap leather to confirm length to cut. Wrap leather piece around handle and mark position.

On this example the handle diameter is 2.5 cm and circumference is about 8.8 cm.


Stitch path length is about 15 cm, cut a thread length of about 126 cm (take into consideration of length for cross stitching). Remaining length of about 20 cm on both needle which just right left over. 


Details on how to terminate thread for cross stitch.


                                               👷  End of document  👴

Tote Bag # 14 (Canvas/Leather tote bag)

       Tote Bag # 14 (Canvas/Leather tote bag)

          This tote bag was to try out a mixture of canvas and leather material. The objective is make the bag lighter but strong enough for it intend purpose.

Also explore other way to make a heavy duty handle and try out new idea for inner pocket organizer.


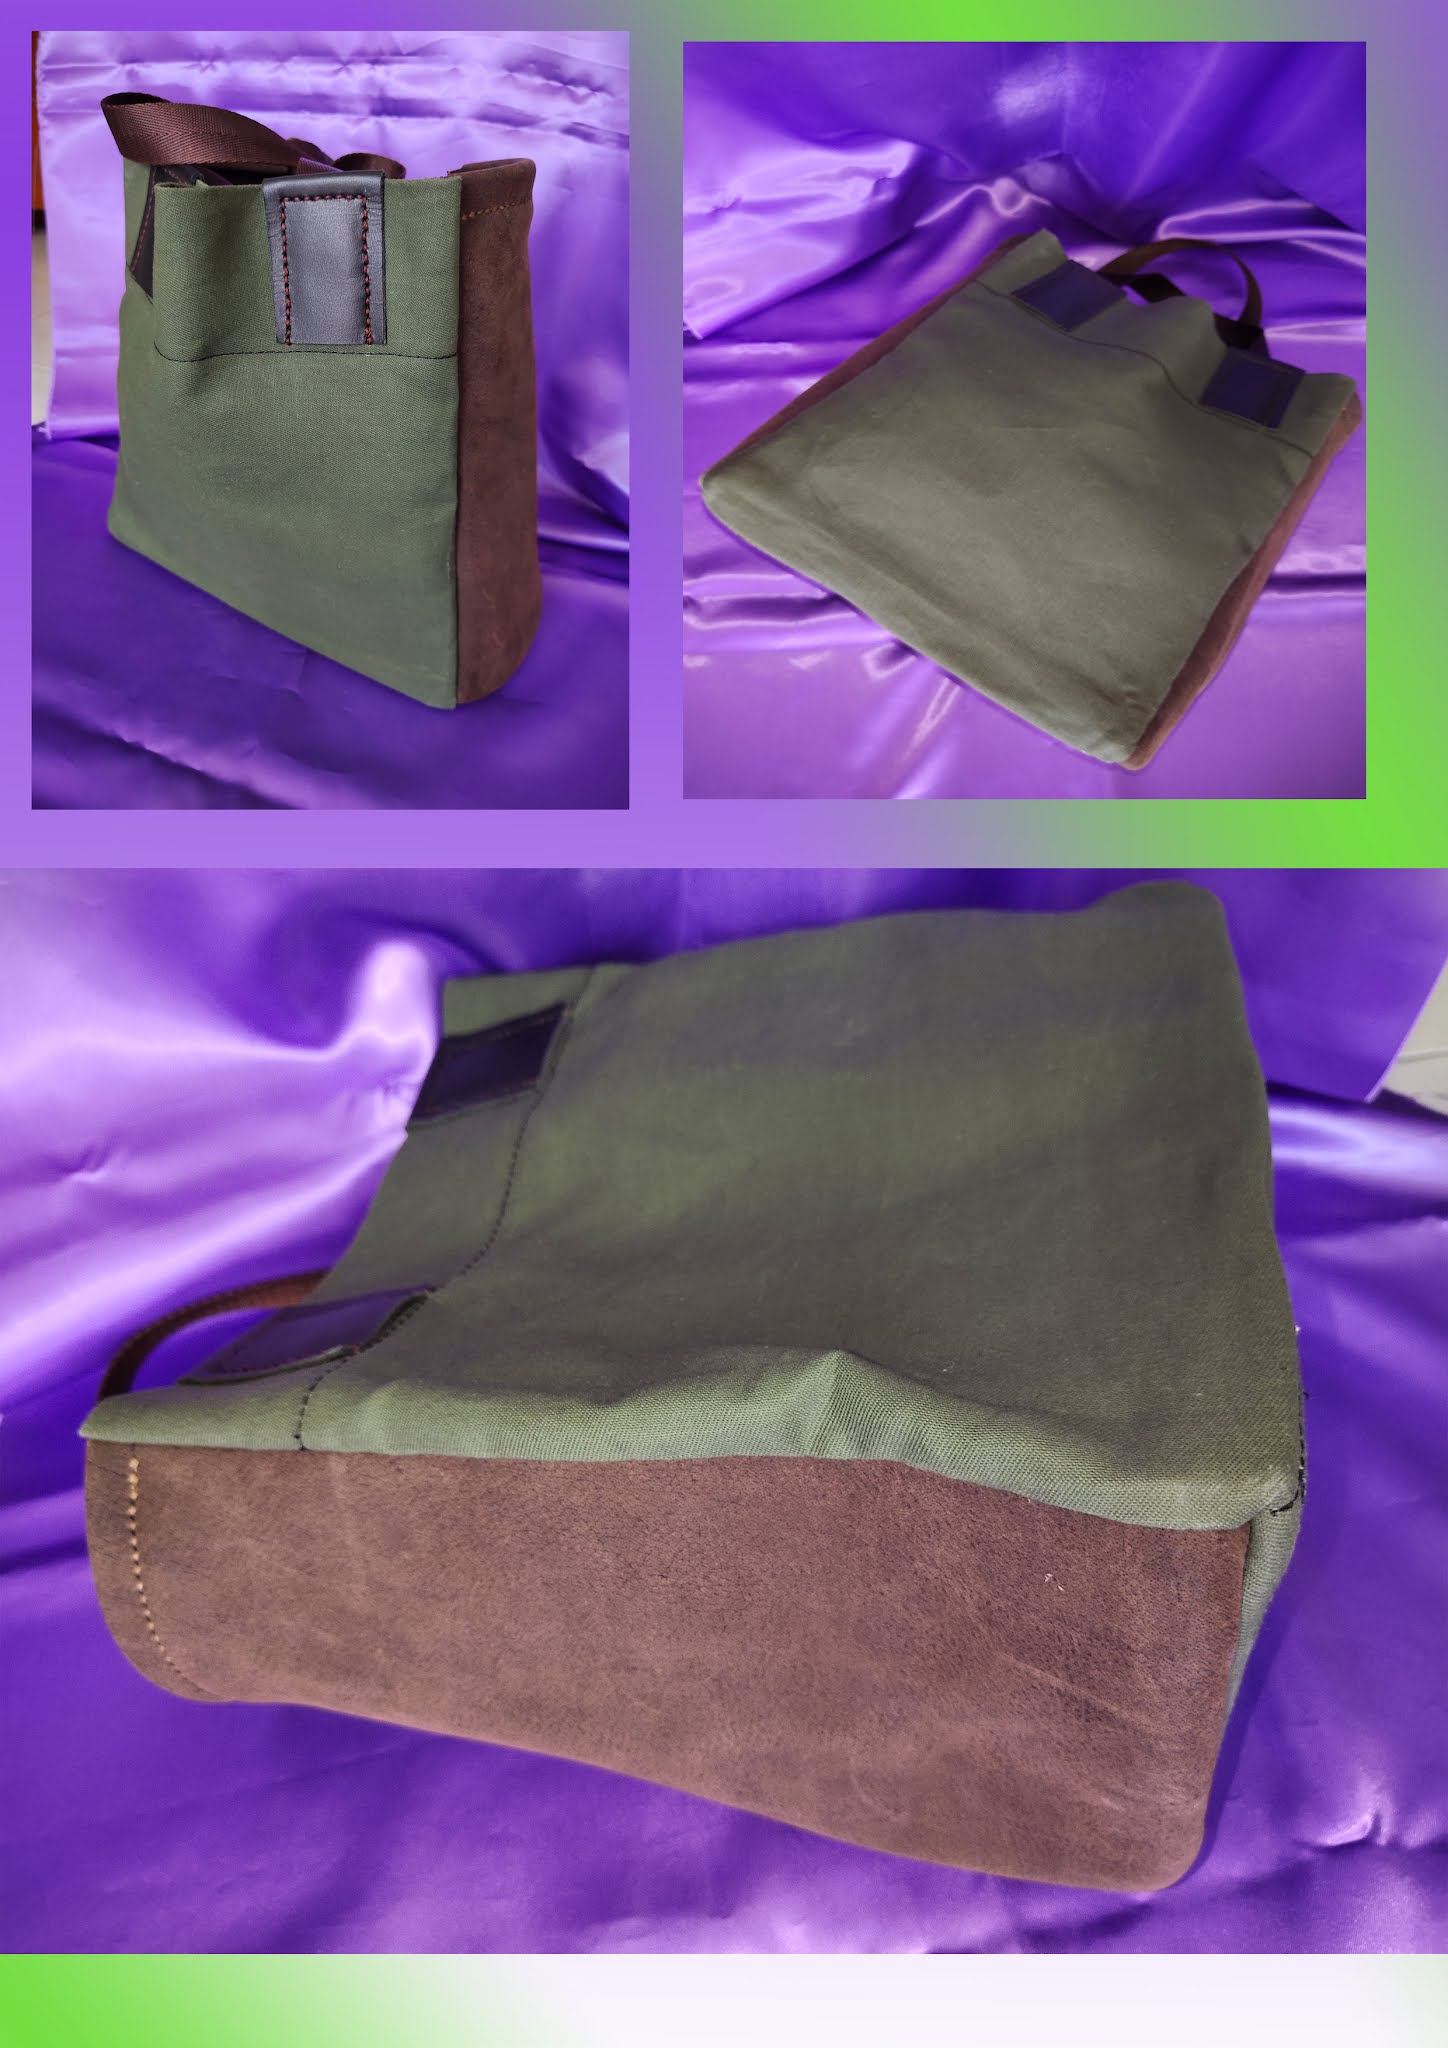
Over all view of finish project of tote bag.

The front and rear is canvas material while the side are leather.

Inside view of bag, with web material as handle.


Inside view where the bottom layer have a piece of leather is sew at bottom.


Partial inside view of one side of bag. It shows how the pocket layer is laid out with respect to other layer.


Do take note, it better to sew all the pocket layer activity
and once it is ready. It is attached to the bag, take note the seam of the canvas is hold the pocket layer for better support.

Tips, the pocket design and shape and size depend on the user needs. Of course the edges of pocket need seam to minimize the raw edge of canvas frail.
Take time to slowly sew the pocket design.

On this design there are three pocket.

As for the bag side, it use a 2.0 mm leather material. 

There is seam allowance for the side and bottom. Do note the side are not straight line in this case, this will create a bell like shape. It result is bell like shape and introduce new challenge when doing stitching between the canvas edge to leather edge. 

It is better to start stitching from the top to bottom and stop at about mid point of bottom . Start stitching the other top edge and moves along to bottom. The two stitch cross over at one point.

Each person have different method to start and stop stitching base on their preference. You can also do stitching with the inside fold out method. 

For this project need to pre-punch stitching hole on the leather material.


Close up view of side wall leather to canvas.


Do take note on position between the canvas meet the leather. Refer to the arrow showing where the canvas and leather meet and start stitching.

Do take note the looping stitching use here. Hence the the thread length to cut is slightly longer.

The challenge here in stitching method is use awl to punch and align the pre-punch hole to match.


The web handle and padding need to properly align and need to check from  time to time to minimize movement.

The pad is pre-punch hole so that it match and less alignment issue during stitching.


Step to attached side layer to bag. Do take note the sequence to follow and watch the facing surface direction during this step.

Will recommend to follow the surface facing direction when doing stitching step.


Step to attached the side layer to project.

The use of clip is to secure it while the glue take time to cure. It better to temporary secure the other side with thread so that the alignment is maintain while glue the other side edge.

This is how the pad and strap are attached.

This is how the pad is stitch to web handle.

The real challenge is when attach the pad to canvas ,need to take care the leather pad will move a bit hence need to recheck the position status from time to time.

This due to canvas surface is smooth and flexible compare to leather surface.


Finish project note the handle is sufficient drop length for the arm to hold bag.


= * = * = * = * = * = * = * = Drawing page = * = * = * = * = * = * = * =


=  = - - - - =  =   =  = - - - =  = - - - - =  =   =  = - - - =  = - - - - =  =

* Note: This is trail use of "Google Translate" application from ENGLISH to JAPANESE, sorry if this translation do not make sense or suitable word or sentence, please do let me know and thank you.

* 注: これは英語から日本語への「Google 翻訳」アプリケーションの試用です。この翻訳が意味をなさない、または適切な単語や文でない場合は、申し訳ありませんが、お知らせください。ありがとうございます。

                                          👦    End of  document   👴

                    End of document 👴

Repair rice cooker

 Was given a small rice cooker HANABISHI model HA1330, with problem cannot turn. Found this unit is due to power cord is defective (discover...