Coin Purse project..
This started off as a project suggested by a friend.. So let start off with the design, cut out pattern for a very simple but practical for small and medium size coin purse.  |
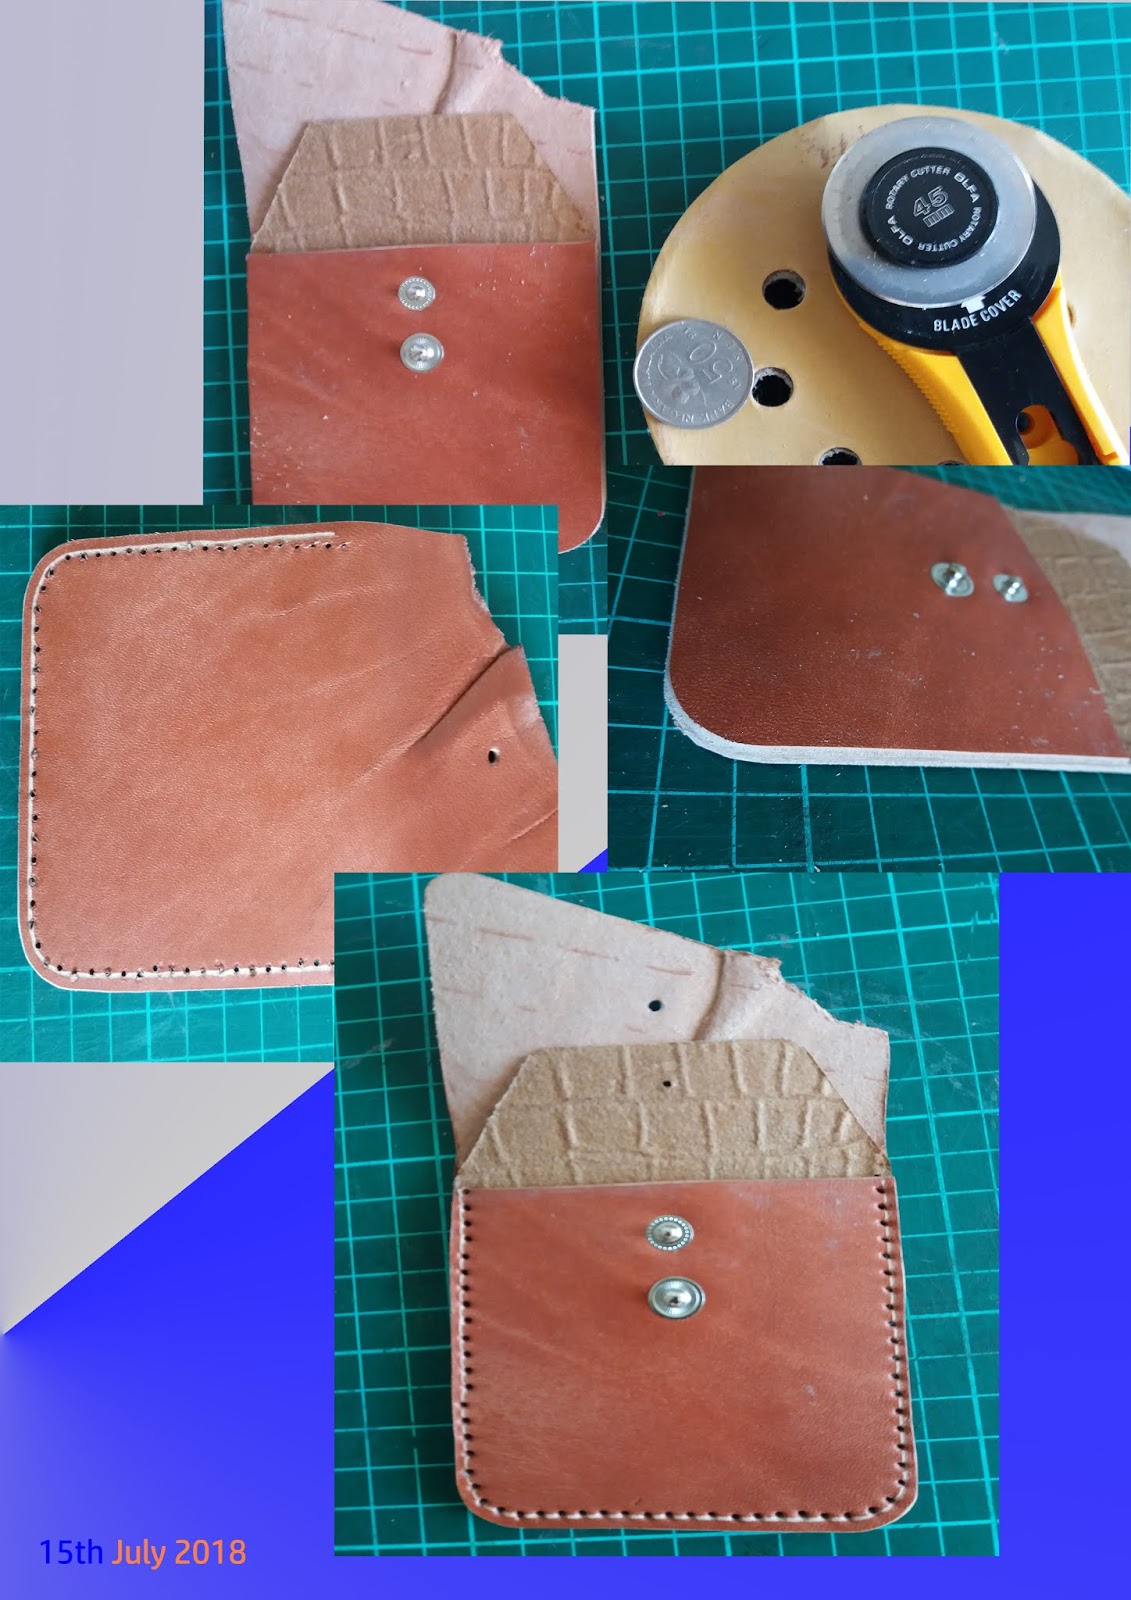
| Front view of coin pruse |
 |
| End product of project coin purse |
 |
| Rear view of project |
 |
| Sharing sticthing used on project |
 |
| Raw material for coin purse project, approx 8cm width |
 |
| Cut out material to requirement |
= = = = = = = = next step = = = = = = =

Refer short video on how the round corner is done.
 |
| Draw line to mark point for ease to apply glue to edge |
= = = = = = = = = = Next step = = = = = = = =
 |
| Fold the flap and use a pointed awl to mark place for button location. |
 |
| Use the hole punch to mark over hole for alignment. Once confirm punch hole. |
 |
| Using punch to make a light impression to confirm before punch hole process |
 |
| Once confirm punch a hole for button |
 |
| Add post of button in preparation with hand press |
 |
| Process to add button head with hand press for VT5 button size. |
= = = = = = * * * = = = = = =
Sharing best practice to cut round corner
* * * * * * * Another coin purse design with two pocket * * * * * * *
This design is slightly different in that the inner center layer is to create two pocket zone. The center layer is stitch to a U shape of the coin purse.
 |
| Front view of project |
 |
| Rear view of project |
 |
| Two pocket zone coin purse. = = = = Next sharing step to create project for two pocket zone above = = = = = |
 |
| Marking and position inner layer |
 |
| Punch hole in preparation to do stitching It better to glue two item for ease to punch hole |
 |
| You notice the top edge of inner layer is do burnishing before stitching |
 |
| Preparation for gluing both part |
 |
| Outer layer where burnishing is done |
END of Project --
Another project for double pouch coin purse

Step# Select material for 2nd Layer.
Step# 3 select material for project.
Step# 4 pre punch hole for 3rd layer. prepare to install button.

Step #5 prepare edge for 3rd layer for burnishing purpose.
Step#6 cover both button on it rear side on 3rd layer .
Step# 7 Apply glue on both materials.
Step# 8. Apply pressure when sticking both materials

Step# 9 Do burnishing step for the edge of leather.
Step#10 Get ready to prepare for next step
Step# 11 File surface of layer 2 in preparation for apply glue to stick with layer 1 material.
Next step is to punch hole along the edge for doing stitching work.
End of document


No comments:
Post a Comment