Tape measure case

 This project is to allow user to carry their tape measure around safely and protect the tape.

This  idea was from Pinterest site- "Tape measure case"


A sample picture of project to try out


Another sample picture for project


Coil up tape measure to size, then cut the material to match for project.

The top strap is to box up the tape measure.


The width of this strap is about 2 cm and length about 10 cm. 


Apply paint to edge using a sharp awl tip. Allow time for paint to dry on edge before proceed to next step.
Trying out new paint materiel and notice it take about 20 to 25 minutes to dry. It depend on external environment and how much paint is apply on edge.


Pre punch hole for the top layer and place a button post for adjust position and location.

Once the top layer is ready place over the lower layer to transfer matching punch hole with sharp awl.
Next proceed to punch to punch lower layer, before stitching it better to install button on top layer follow with stitching.
This way the button is sandwich in between both top and bottom layer.


Transfer punch hole position for bottom layer


Prepare another strap to attached to project. The other strap to to hold a button cap.


Punch hole for the base of strap.


View of complete project.


Another view of completed project.


== == == == == == == == == Another design tape measure case == == == == == == == == == == ==    


Cut a strap of size 3 cm width and length 20 cm.


Place button post into leather part and use jig to crimp in position.


Attached another strap behind button after skive on one of the end.


Punch hole and stitch both part together.

Note :- try out this way to minimize thread thru, need be careful with needle in opposite direction.

Prefer to have both needle pointing to different direction.


Prepare a loop on rear of project.

Mark place to cut a  slot line to insert a loop part, then glue to it position and stitch to main part.


Use a tool to cut a fine line to insert loop part.


Glue on end of loop to the main strap.


Punch hole to loop part to main body in preparation for stitching


One view on completed project.


Another view of project


= == == == == == == == == Another design tape measure case == == == == == == == == == == == 


Another project, however the end result is not as expected.

This was base on using a loop to lock the open end of the strap but the overall form was not functional .


                             👷  End of document 👴

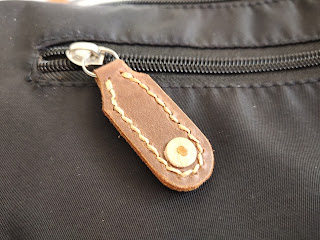
Zipper repair bag

                This project is about zipper puller which was missing or broken.


Bag with missing or broken puller.


Small ring and mark on leather strip, to cut at mark point.


Draw line in preparation to cut to shape.


Skive the middle section, to add an interface layer for support and reduce stress on the ring.


Place a small strip of interface material in the center to verify how much to use.


Glue interface layer and insert ring into project.


punch hole and prepare for stitching


Add a small round piece on both side. To give better grip for puller.


Use knife to split round piece to required thickness.


Create a double thread for better support .


Insert another thread into the loop end and pull for tension. Then terminate both side.


Project complete...


                                  👷  End of document 👴


Washing machine maintenance

 Panasonic model NA-F75S7 eco auquabeat, washing machine maintenance.

Sharing some simple tips on maintenance for Panasonic washing machine, top load version.

Just follow the recommended maintenance as per the instruction ; Operating & installation instructions , fully automatic washing machine (Domestic use). Please refer to page 10 , maintenance section.

or use this url link - https://www.manualslib.com/manual/1943215/Panasonic-Na-F75s7.html?page=12#manual

Note:- this maintenance task it is better leave to a technical personnel who are experience and aware of the electrical and mechanical safety aspect before proceeding. Highly recommend to read carefully the factory safety precautions page before start work to minimize injury.

There is two simple activity for this washing machine, 1) Water inlet/hose filter cleaning and 2) Lint filter cleaning.


1) Water inlet/hose filter cleaning


Refer to manual under maintenance section.

The water hose need to disconnect before this activity.

Do take note before start work best to get ready some dry cloth and a pail. 

It easier if the mains tap is in close position before remove water hose from washing machine.

If you allow the machine to operate briefly (start mode and turn off power) to allow the build water pressure within the water hose to dissipate. 

In doing this it is make it easier to loosen the water hose nut.


Use running water to remove dirt , can use an old toothbrush to remove some fine dirt stuck at filter area.

Use a dry towel to clean the rubber washer.


2) Lint filter cleaning.

Follow work instruction as per manual . For safety purpose it best to remove power cord for unit.

Remove lint filter from tub. 


Use an old toothbrush to help remove lint stuck on lint filter fine hole.

If the lint material is harden it best to soak in water to assist in cleaning process.


Replace the lint filter to it original position. This complete the simple maintenance process. With this we end the work and happy washing  

                                  👷  End of document 👴

Mini Tag RFID pouch


This project is for a Mini Tag RFID pouch. The device is for access to barrier gate to enter an apartment/ condominium home .

To make a pouch to hold the Mini tag RFID device which is attached to a key chain.


This how the project looks like, using a snap on hook.


 View of MAG CCD100 mini tag RFID. Verify where the sensor location.
Check overall size and measurement and thickness is about 8 mm, width 4.5 cm and length is 5.9 cm (sorry typo error on picture).
Use circle temple to draw line before cutting, the purpose of the hole is to allow the sensor path is not block off.

Add a stiff layer to hold the button post, as the project material is too soft to support. The other purpose is to conceal the button and minimize impact to Mini tag surface.


This step is important to check how long the strap needed and hook to a snap on clip.
It essential to ensure the sensor view is not block when the key chain is folded up.

Hence see the position for snap on and position of project.


To minimize pulling stress where the snap on "ring loop" with a strap over it.
Just add a small interface material to underneath strap.


Project completed.
Overall view and show how the key chain is used with new Mini tag pouch.
Note:- sharing inform on this device on how to remove casing to replace battery.

Please view this url link. https://www.youtube.com/watch?v=eZ9HeB9nRp8

title - How to change battery for CCD100? by MAG Security System  ( 0.38 minutes)


                              👷  End of document 👴


Man shoe repair (stitching sewing) - 男性靴修理(ステッチ縫製)

 This is about my own shoe repair for the outer sole separated... This is a Clarks - Gore-tex . これは、剥がれてしまったアウターソールの靴の修理についてです。これは、クラークスのゴアテ...