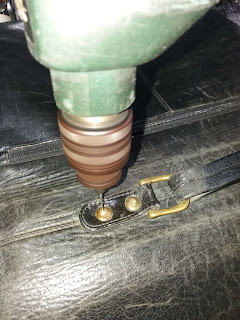
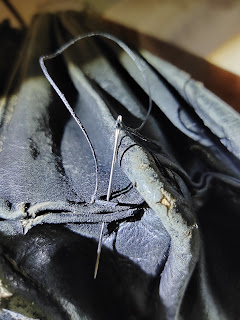
Repair leather executive bag ( bottom corner )
This leather bag repair is very challenging as it have different parts of the bag need attention.
Due to it usage the wear and tear is normal after over 15 years of usage.
This project is to concentrate on executive bag bottom with opening at corner of bag.
There two parts to perform:-
1) Broken thread between joint
2) Worn off leather at corner (expose inner part is visible). There are four corners on each side, total eight corner to repair.
このプロジェクトは、バッグの隅に開口部のあるエグゼクティブバッグの底部に焦点を当てています。
実行する部分は 2 つあります:-
1) ジョイント間のねじ山が切れた
2) 角の革が剥がれています(内側が露出しています)。 修理するコーナーは各辺に 4 つあり、合計 8 つあります。
LimDATA/ LeatherProjectJune2019 /THAMSHBag
Overall view of the executive bag , bottom section.
The wear and tear have resulted on surface leather expose inner parts.
As the high contact point is evident where the top layer disappear and exposed inner part is visible.
エグゼクティブバッグの底部の全体図。
表面の革に磨耗があり、内側の部分が露出しています。
最上層が消えて露出した内部部分が見える場所では、高い接触点が明らかです。
Closer view of bag to shows wear and tear .
There two parts to perform:-
1) Broken thread between joint
2) Worn off leather at corner (expose inner part is visible for all eight corner).
バッグを詳しく見ると、磨耗が見られます。
実行する部分は 2 つあります:-
1) ジョイント間のねじ山が切れた
2) 角の革が剥げている(8 角全て内側が露出している)。
For this repair case where the thread is broken or missing, fixing is straight forward.
Simple stitching to close the broken thread resulted in gap to get the repair resolved.
ネジ山が壊れたり紛失したりしたこの修理ケースの場合、修正は簡単です。
切れた糸を閉じるための単純なステッチでは、修復するための隙間が生じました。
Use awl to check on hole spacing and confirm how to re stitch wear and tear corner area.
Tips:- in this repair the worn off layer remain intact so to make repair easier and repair selected area.
If remove part of the worn off layer it will involve alot of work. Reason being the lining is wrapped around the whole bag edge.
千枚通しを使用して穴の間隔を確認し、コーナー部分の磨耗や破れを再度ステッチする方法を確認します。
ヒント: - この修復では、摩耗した層はそのまま残るため、修復が容易になり、選択した領域を修復できます。
摩耗した層の一部を除去すると、多大な作業が必要になります。 その理由は、裏地がバッグの端全体に巻き付けられているためです。
An other view of awl pin to verify stitch point.
ステッチポイントを確認するための錐ピンの別の図。
Prepare marking to measure the hole distance.
穴の距離を測定するためのマーキングを準備します。
Tools for this repair project.
1. Lighter
2. needle set
3.thread clipper
4. head light.
5. magnifying glass
6. awl #3.
The tools required might vary as the repair progress.
この修理プロジェクトに使用するツール。
1. ライター
2. 針セット
3.糸切り
4.ヘッドライト。
5. 虫眼鏡
6.千枚通し #3。
必要な工具は、修復の進行に応じて異なる場合があります。
Verify the strip length to cut for repair.
The strip length is determine or verify for all four corner . This way the warp around are consistent length.
修理のために切断するストリップの長さを確認してください。
ストリップの長さは、4 隅すべてについて決定または検証されます。 こうすることで、縦糸の長さが一定になります。
Warp a leather strip to confirm it length and wrap around requirement.
A line is drawn to match the corner edge for stitching guide.
革ストリップを反らせて長さを確認し、要件に巻き付けます。
ステッチガイドのコーナーエッジに合わせて線が引かれます。
Use a divider to verify the stitch gap and measure with ruler.
デバイダーを使用してステッチギャップを確認し、定規で測定します。
Use a ruler to mark point ,gap distance and punch.
Line drawn base on measurement.
定規を使用して、ポイント、ギャップ距離、パンチをマークします。
測定に基づいて描かれた線。
Punch hole with awl, as did not have punch with 5 mm gap spacing.
5 mm のギャップ間隔のパンチがなかったので、千枚通しで穴をあけます。
Punch hole on both side, to ensure consistent distance for both side to stitch.
Tips:- found it better to punch hole on one side as during process of stitching the needle hole might not match on both side.
両側にパンチ穴をあけて、両側のステッチまでの距離を一定にします。
ヒント: - ステッチの過程で針穴が両側で一致しない可能性があるため、片側に穴を開ける方が良いことがわかりました。
Estimate thread length for stitching use , for this found it need about 5.5 times the thread length is needed.
It recommend to factor in the thickness of the stitch required.
ステッチに使用する糸の長さを見積もると、必要な糸の長さの約 5.5 倍が必要であることがわかりました。
必要なステッチの太さを考慮に入れることをお勧めします。
Use clips to hold the strip while stitching the corner.
Notice if the corner are clipped on the leather will follow the corner shape.
コーナーをステッチする間、クリップを使用してストリップを保持します。
角をクリップすると、革が角の形状に従うことに注意してください。
At time use an awl tips to guide the needle follow thru.
時々、千枚通しの先端を使用して、針のフォロースルーをガイドします。
This is one way to guide the needle path with help of awl. At time the path and direction is difficult for thread to pass thru.
Try use this method to do stitching, as the edge is too thick for smooth stitching.
これは、千枚通しを使って針の通り道をガイドする 1 つの方法です。 時々、糸が通りにくい経路と方向があります。
端が厚すぎるとスムーズなステッチができないため、この方法でステッチを行ってみてください。
How to terminate the thread, is to back stitch and cut thread.
糸の始末は返し縫いして糸を切ります。
Estimate thread length for stitching use , for this found it need about 5.5 times the thread length is needed.
It recommend to factor in the thickness of the stitch required.
ステッチに使用する糸の長さを見積もると、必要な糸の長さの約 5.5 倍が必要であることがわかりました。
必要なステッチの太さを考慮に入れることをお勧めします。
Comparing thickness between each bottom edge.
各下端の厚さを比較します。
Each corner have slight difference in width. this pose challenge for strip cut to various .
Hence cut strip.
各コーナーの幅は若干異なります。 このポーズはさまざまなストリップカットに挑戦します。
したがって、ストリップをカットします.
End of document 👴
 Use sewing machine to stitch certain parts ("strap to support hand warp" ).


