Tobacco Pipes Stand

 This is another tobacco pipes stand / holder standalone project.

Project was shared on 4th Nov 2021 under title - Tobacco pipes and cigar holder.


Drawing for tobacco stand/ holder


Do take note:- the middle layer sandwich in between the outer layer.

It is design to wrap around a D ring. Hence it is trimmed to fit the shape of the outer layer. 


Use sand paper to smoothen the top edge.


Wooden slicker to burnish the edge after applying LEDAFIL chemical (32450 neutro colourless). So as to coat the top edge and bring out the shine.


Tools used for this project.

Left side is rough sand paper, medium sand paper, fine sand paper, cloth slicker (jean materials), and wooden slicker tool.

Note : top is a bottle of LEDAFIL chemical (32450 neutro colourless)


Overall view of completed project. The bottom project have added gold colour acrylic paint on certain part of edge


                                 Close up top view on project

Bottom view close up


                                                         👷  End of document 👴


Tobacco cigar holder 02

 Another design for Tobacco cigar stand / holder 02.

This design have four sided face to hold cigar.


Cut four piece of same size for this project.

size of project is 7 cm by 5 cm , qty four pieces.


Cut an arc on all four side layer. Use a plastic template to cut arc shape profile.


Tools use for cutting arch on four pieces.


Skive both side edge where the edge meet.


Tools and material used. Not inclusive of thread and needles.

Note: bottom right is a small container with wax, used when punching holes with prickling iron. 

Dip tips of prickling iron into wax container before use. This is to make it easier to remove prickling iron. 


Close up view where all four side are glued together.

Prepare to punch hole before stitching.


Top view


Different angle view on project


Coat all top edge with dye.


Tool and material for apply dye to edge.

Note:- dye used for fabric material type.


Apply dye on edge of project with awl tips.


Project completed..  Any comment or suggestion is welcome.


Update 16th March 2022.


Use a black marker pen to paint bottom edge of project.

Recommend to use burnishing tool on edge after black paint is dry.


Before apply black paint marker, it only apply brown dye at bottom edge.


                    👷  End of document 👴

Repair shoe of kid

 Today project is on shoe repair for kid (grand daughter). 

7th March 2022

This project is on  kid shoe repair.

The bottom sole is defective, the bottom/outer sole is detached for both right and left shoe.


 Both right and left kid shoe with it bottom/outer sole detached.


Check on status of defect, in this case the bottom/outer sole is "open" or detached.
It is a good idea to verify is there any other defect on shoe.


Inspect and verify issue for the other side of shoe. Same issue with bottom /outer sole detached.


Use a brush to remove to dirt on both bottom outer sole surface (yellow sponge) and the shoe insole surface (paper interface).


Sand paper is use to clean old glue traces and and remove loose dirt.


Update on 10th March 2022.


Some of tools and materials used for this repair.


Sand paper to clean the surface before apply glue.


Apply glue to outer sole surface. Allow sufficient time to cure glue before attach both surface.


Take note, this is a slight mistake on this shoe repair. The thread are expose on outside surface. Another point if punch hole between yellow and grey layer it is possible it might split..


Recommend to remove the outer most sole (jagged blue layer).
And punch hole with stitches sewing awl ( Special sharp pointed tip to hook) thru the grey/yellow foam layer.

See other picture below for more details.


Pre-glue preparation.

This is the outer most sole , remove old glue and clean surface.

Use sharp tool like pointed awl, knife edge to remove dirt and old glue material surface.

This is an important step to help good adhesion between two layer.


To roughen the surface area, use this "spiky" tools.


Use awl to pierce hole before inserting stitching sewing awl.
At time the sole material are harder material, pre punch hole is less "stressful" for the stitching sewing awl tips.

Tips:- stitching thread from bottom is better way to "hide"threads ,if stitch thread from the side way the thread is visible.


Stitching sewing awl inserted, do take note of the inner sole where the tips is position.
To minimize piercing other part of shoe, check status from time to time when inserting tool. 


When pulling stitching sewing awl do take care of the sharp tips..

This is an example for the heel area.


Pull on other end of thread to create a loop sufficient to thread pass thru.

Tips. the first loop it recommend to tie knot with other thread end.. to terminate is the pull the thread and trim excess thread and use lighter to melt it end.


insert a thread thru loop. Once it is ready tighten the loop thread .


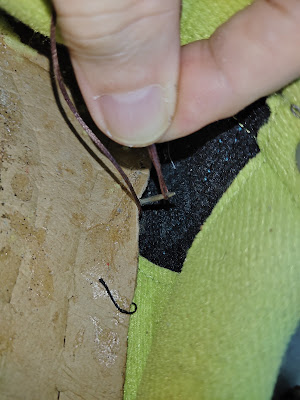
Make a thread loop on inside to catch the stitching sewing awl hook.

You need to have some tension on both side, one is to pull thread away position and the other is pull awl handle away in the opposite direction.


Close up view on how the thread loop catch the awl hook.


Re stitch the broken strap, use normal sewing thread and needle to repair.


Compare the top shoe where the thread is hidden. do take note to help and guide have use pen to mark line on both edge when re attached the blue outer most sole to the grey layer.


Repair project done. Learn a few tips when repair shoe.


Sharing some YouTube video on shoe repair, it good practice and give idea how to repair shoe. Please click on url link to view video.

https://www.youtube.com/watch?v=OQw00OswPe8

How to Fix Your Shoes?

310,986 views                   13 Dec 2017        Taras Kul (5:59 minutes)


https://www.youtube.com/watch?v=OG8j5f13LIQ

 FIX AND SEW SHOES STEP BY STEP/ JAHIT KASUT

33,684 views                                      14 Jun 2020                         Maelx (8:29 minutes)


                    👷  End of document 👴


Add accessory to tote bag

         Adding a simple accessory to tote bag handle. Refer to Tote Bag #2 project on Jan 2019

Try this new design and functionality for tote bag handle.

When use tote bag both handle tend to slip off from shoulder while carry heavy items.

 Adding this simple design strap allow both handle to be hold together. It is effective way to manage handle movement in a way when carry over shoulder.


Simple design to hook and hold both handle strap together.

Here is use a VT5 size button. The length of leather strap is depend on diameter of the handle (in this case is about 15 cm in length).

Recommend to pre punch hole close to the VT5 male post.


Check position to stitch the post end strip.

Use a VT5 size snap on button.

Top is the socket of VT5 size, the bottom is called post of VT5.


Use awl to punch hole for stitching.


Close up view on accessory for handle.


End of project. Happy shopping.. and stay safe.


=  = - - - - =  =   =  = - - - =  = - - - - =  =   =  = - - - =  = - - - - =  =

* Note: This is trail use of "Google Translate" application from ENGLISH to JAPANESE, sorry if this translation do not make sense or suitable word or sentence, please do let me know and thank you.

* 注: これは英語から日本語への「Google 翻訳」アプリケーションの試用です。この翻訳が意味をなさない、または適切な単語や文でない場合は、申し訳ありませんが、お知らせください。ありがとうございます。

                                          👦    End of  document   👴

                                     👷  End of document 👴

Repair rice cooker

 Was given a small rice cooker HANABISHI model HA1330, with problem cannot turn. Found this unit is due to power cord is defective (discover...