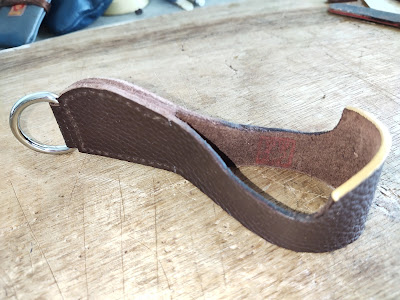
Small project for friend

                 A friend who wanted a leather cash pouch. The original pouch was a non leather material the size was a bit wide, so request to customize to match his needs.


Original pouch use was this design, it is non leather material (like coconut fabric material).

The original design was 25 cm x 10 cm size, it is slightly wider for Malaysia ringgit note of nomination RM50.


This a completed project and it is slightly smaller but can fit a Malaysian ringgit RM 50.00 note.


Check on thickness of original leather is about 2.3 mm


Do take note on small print to shows area which need skiving.
Certain area need skiving to overcome the original thickness which make it difficult to fold and looks too bulky.
Example the top flap and front facing edge, will recommend to skive as thin as possible.

Tips :- method to fold flap edge please to this link.

https://www.youtube.com/watch?v=7ACGmh2Q7-o&t=1178s
Stitching a Zip Into a Leather Bag 4K
95,807 views           9 Oct 2017 Leodis Leather (37:59 minutes)

Note : time index
How to fold the edge 18:17 to 18:50
How to use folding tools 18:51 to 19:32


Use clip to fold flap in place. Try to add water along the flap fold line on the inside flesh side.

It takes time for flap to lie flat, as user did not request for button or other fastening device to project.

Rear view of project

Note:- since this leather material is not flexible it is quite challenging to make this project using this leather property. Even to burnish with chemical is that straight forward, it take several attempt but the result is limited.


Update 2nd Dec 2021


= = = = = = = Pen holder stand = = = = = = =  update on 26th Nov 2021

A request to make a three pen holder from a friend.

The first version use a standard edge stitching and the result is not satisfactory in term of shape and end result is try out the box stitching method.


Punch hole from the flesh side, it better to punch as close to the edge about 2.3 mm. This is depend on the thickness of leather use

Burnishing the round cut hole with "ledafil" chemical to bind the fibre edge when rub with burnishing wooden tool.

It need several coat as this leather property 


To ensure it is clean punch round line, check the flesh side.


It easier to draw guide circle line to better view and check punch in correct position.

Tools used for this project

In this case the round punch use is 20 mm diameter.


Use ruler to draw line in preparation punch hole.
tools to draw line before punch hole and line up side by side to align punch hole.

Use awl to punch hole along the edge at an angle.

This is to show the awl pierce thru at an angle for box stitching. As the leather is thick and tough it takes time to execute slowly. 


Use the punch to check on position to insert awl  .

Tips:- it help to track and position are in alignment when punch hole with awl tool.
Start the box stitching.

*Do take note the way to start stitching the needle position is not the same per saddle stitching needle position.


+ + + + + Sharing information + + + + +

YouTube training video related to butt stitching and box stitching as guide from expert. It is useful to learn their tips and skill required to perform this task.


https://www.youtube.com/watch?v=Gv-hlZ4q1Vo&t=2s

TWO New Stitches to Elevate your Leathercraft!

169,638 views    5 Jun 2021  Corter Leather (23:10 minutes)

 TWO New Stitches to Elevate your Leathercraft!

We usually use the Saddle Stitch on every leathercraft project we make, but there are some different stitch methods you can use to open you craft up to many new shapes! In this video we make a leather pen cup using two of these stitches - the Butt Joint and the Box Joint. These stitches allow you to make 3 dimensional leathercraft projects by joining the leather at right angles or totally flat with no overlap. They take a bit of time to master, but once you've got them down they're totally worth it!

= * = * = * = *  =

https://www.youtube.com/watch?v=cvpGDRfWxQg

7 Different Ways to Stitch Leather by Hand

7 Sept 2019 Maze Leather (18:32 minutes)

 Add some new ways to stitch your leathercraft projects. You can check out a detailed article on steps here: https://mazeleather.com/7-different-w...

Timestamps Below:

Single Stitch 00:30            Z Stitch 03:14

Baseball/V Stitch 06:36    Butt Stitch 08:45        Cross Stitch 11:34            Box Stitch 13:48

French Stitch 16:09

= * = * = * = *  =

https://www.youtube.com/watch?v=GPuQQq2fzQw

Tutorial : How to do the BOX STITCH, Leather Craft
105,098 views     14 Dec 2017 ChloeWorld BN (5:44 minutes)
 
Hi :) I shared how to do the box stitch & my very first box stitching moment! 
Hope this video is helpful. Thank you so much for watching ♥
* Tool Information * 
Griffe/Chisel/Pricking Irons/Stitch punches: KS Blade Hole Punch

박스스티치 방법 KS블레이드


= * = * = * = *  =
皮革海洋駒縫盒六分鐘就上手!🐳 Leather Box Stitching Like A PRO In 6 Mins!
2,879 views          26 Sept 2020       HongSaisai Leather (6:32 minutes)
 
小海草們好久不見啦🐠
這次魟魚博士與深海小夥伴帶著超美的海洋小方盒回來了!🌊🌊
How to do leather box stitching?
Let's make an ocean style box together!🐳

= * = * = * = *  =


  End of document 👴

Tobacco pipes and cigar holder

Tobacco pipes and cigar holder


Update on 7th March

Tried to improve on the project edge burnishing to smooth and refine the surface .  

What was tried  by using fine sand paper of grit 1000 to polish the edge and apply chemical "Ledafil" and use wooden slicker and "jean" cloth to burnish edge. It is still a major challenge to improve. There is some slight changes, it looks like certain leather properties (chrome tan) make this a great challenge. Try other leather type, result vary depending on leather type and property.

Have to check with other expert to seek advise and check for possible solution or work around. Have view some YouTube "expert" which share idea and tips for better work around. 


 = = = = = = = = = = = = = = = = = = = = = = = = = = = = = = = = = = = = = = = = = = = = =

Update on 30th Dec 2021.

Tobacco Pipes Stand


= = = = = = = = = = = = = = = = = = = = = = = = = = = = = = = = = = = = = = = = = = = = =

Update 26th Nov 2021.

After getting feedback from end user,  due to need to accommodate for a bigger diameter cigar.


These tools are required for this project.

Tips:- it better if you have a straight line cutter in this case. The result is better in term of finishing and clean line.
Tools required for project.


When attaching both layer, it easier to start from either end and glue to other end.
This is to allow the curve part to match.


Stitching done to ensure two layer are firmly attached.

Punch round hole will be easier if the top layer is pre- punch first. Follow by the round punch thru the first layer to second layer.
In this case use a 6 mm round punch.

If try to punch round thru two layer is more challenging.

Top view of project


Update image on 2nd Dec 2021


Drawing for cigar holder.


= = = = = = = = = = = = = = = = = =  4th Nov 2021 = = = = = = = = = = 

This is a friend request to create a tobacco pipes and cigar stand / holder.

The design of these product is base on Pinterst web site, some idea are taken from there. Credit due is from them too.

This is for a cigar holder project.

You may want to follow the sequence . One end of the project is glue first. This to help hold in position to punch stitching hole.

The reason is apparent the bottom layer is slightly shorter than the top layer is to accommodate the curving path.

It better to cut the hole for top layer first. Then trace on to other surface on the bottom layer. This is because it already curve hence it challenging to punch thru or cut line on uneven surface.


To cut a "valley" use a end strap cutter for belt to create this shape. Take note the bottom layer is resting at one end of a wooden block while cutter is position.
Holding the top layer in position for end strap cutter cut the shape as required.


After cut thru the top layer use a pen to mark line for the bottom layer as shown. Position end strap cutter and follow the line to cut for bottom layer.


After cutting is done glue both top and bottom layer, once the glue harden.

You will notice a inverted "V" shape on project.

Next punch a 4 mm round hole on both end of the project, inserted a leather string to hold the project in position required.


Some of the tools used for this project. Not visible here is a skive tool, to reduce thickness of leather materials.


Finish project for cigar holder.


Update on 26th Nov 2021.

More update to come.. stay tune.

Another design for cigar holder, it is an adjustable in length of cigar it can accommodate.

 Work in progress...stay tune


This design use simple way to accommodate cigar length.
 

Do take note the original "Valley" cut have been widen , as end user feedback. 
As some cigar is about 2.5 cm in diameter.

Since there are various diameter size for cigar it better to confirm what "valley gap" is required.


A cut for "valley" width 2.5 cm is required in this project. 

Base on end user the cigar is about 1 inch in diameter. Earlier design was base on own assumption which in error.

Further cut a bigger "valley" to meet end user requirement.


= = = = = = = = = = = = = = =

Update on 7th Nov 2021.

      Tobacco pipes stand base on design as shown on Pinterest site. https://www.pinterest.com/pin/15903404924564000/


Finish product.


Update image on 2nd Dec 2021


                                          End of document 👷

Dyson vacuum cleaner repair

 Dyson vacuum cleaner repair

  This Dyson V10 vacuum cleaner was defective with it trigger button stuck and button recess position.

User not able to press the trigger button as it is flash with handle. 

Base on various input the main reason is the plastic trigger mechanism is broken. This resulted in the battery is not turn on.


*** Note:- this type of repair will be best attempt by personnel with background on electrical and electronic, repair experience and knowledge. However if you feel comfortable to try after viewing the YouTube video and have the necessary tools and skill please proceed with caution. As some of the parts are SMT device and fragile connectors and cables.


Saw some useful and interesting  repair video tips from You Tube with related to same issue I encountered for this Dyson vacuum cleaner. I also viewed these video to get some tips on repair related to trigger button failure.

Also learn this vacuum cleaner have know defect on the design of the trigger plastic, there was some comments regards to this matter.

Sharing some url link to You Tube site.

https://www.youtube.com/watch?v=Mmz54gocIq8

Dyson V10 V11 Complex (Defect) Trigger Disassembly / Modification

 •28 Jun 2020 J D   (08:04 minutes)

 I was having an ON/OFF problem with the trigger on my Dyson V11 Torque.  Either the actuator switch on the battery was too tall, or the trigger pin on the handle was too long!

I created this video to show the more complex disassembly and modification or the trigger "leg" to allow more travel on the trigger pin.

NOTE:  Keep in mind, any visible alterations/mods made to these vacuums (while under warranty) ... will most definitely void your warranty.  Always proceed at your own risk and level of comfort while working with electronics, and remove the battery first!

= = = = = = = = = = = = = = = = = = = = = = = = = = = = = = = = = == = = = = = = = = = = = = = = = =

https://www.youtube.com/watch?v=dnptF_fuYwA

Dyson V11/V10 - How to fix trigger problem (trigger broken, gâchette cassé)

•25 Nov 2020 Adrien H   (18:35 minutes)

 Let me show you how to fix the broken trigger with Dyson V11 standard/absolute or V10. 

Complete video disassembly and reassembly.

 = = = = = = = = = = = = = = = = = = = = = = = = = = = = = = = = = == = = = = = = = = = = = = = = = =

https://www.youtube.com/watch?v=PlurUXWUXAg

How To Fix A Broken Trigger On A Dyson V11 Animal

 •22 Feb 2021 The Way We Do It  (8:09 minutes)

 eBay seller of the trigger

Tovhash

https://www.ebay.com/usr/tovhash?_trk...

= = = = = = = = = = = = = = = = = = = = = = = = = = = = = = = = = == = = = = = = = = = = = = = = = =

https://www.youtube.com/watch?v=EYrQ2c0pGc8

OPEN ME UP! Dyson V11 and V10 COMPLEX Disassembly and Clean

 •7 Feb 2020 OPEN ME UP  (30:05 minutes)

 this is a COMPLEX video to show you how to clean and disassemble your dyson V10 and V11 vacuum. This will allow you to clean the vacuum 100%. Do not attempt until you watch the whole thing. There is a SIMPLE version of this video on my channel which is recommended


                                 End of document 👴

Dragon boat festival

 The festival event for dragon boat event  - - - =  = - - - - =  =   =  = - - - =  = - - - - =  =   =  = - - - =  = - - - - =  = * Note: Thi...