Past PROJECT

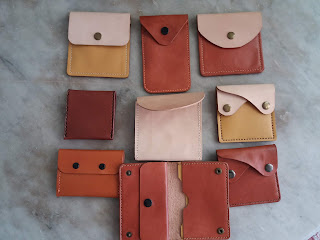
This is to share best practice for past few months project. Have spent a few months to improve and try new design, broaden type of coin purse, option for various design, try different shape and pattern, with new idea, material matching for Luggage Tag, Coin Purse , Key Chain and etc.

======== Coin Purse =======


Coin purse

Coin purse


Two pouch coin purse


========= Key Chain project ========
Simple key chain front view


Rear view of key chain


 In inside view for 6 head key chain holder
External view

Rear view of key chain project

========= Luggage Tag project ========


====== update on 5th Sept 2018 =====
Sharing project as gift to friend to enjoy by putting it to use in their daily life.

 These are some project done as gift for friend .

View of two pouch coin purse


Display project for coin purse, key chain and badge ID tag holder

= = = = = = End of document = = = = = =πŸ‘΄

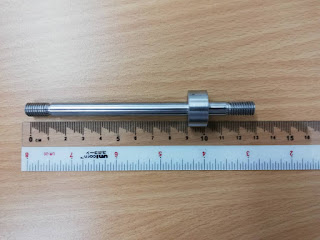
Leather Stripper

Was lucky one supplier was able to help fabricate a leather stripper equipment.
Just sharing this preliminary photo, still in the machine shop.

Overall view without the ball bearing.


Anyone interested I can share the mechanical drawing upon request.
* Only difference is there is a slot line on the base plate to hold the "L" bracket better. 
However to improve better might try to add a measuring ruler as a guide for adjusting width of leather to cut.


   End of document  πŸ‘΄

Coin Purse

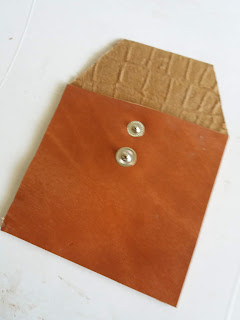
New design coin purse base on friend recommendation.

Some raw materials with natural shape,pattern, texture of edge to make it looks unique in design. As it is very difficult to create a same edge pattern, shape, texture what nature provide design of product edge.


Use template for cut shape of project


                       =============== TIPS =========
Share tips and step to make project more fun.

Punch hole for button before glue materials


Share tips to punch hole on project

Use coin shape to cut corner


One method to cut corner.


Use sand paper to smoothen edge before proceed with burnishing process. The edge if not smooth and uneven the end result will be less attractive and looks not professional.


Apply burnishing cream for project


apply two round leather to cover rear of button .

How to apply round pad on button.

Tools for punch hole for stitching

Start punch hole at one end


For corner need two pin diamond punch to follow curve line

Punch hole from the other end and adjust gap accordingly to fill gap space


                   ===== another coin purse project ======
Select with nature shape edge pattern

Second layer for coin purse

Final front layer added

This is simple tips just make a light mark with punch hole tool on project surface. once confirm punch hole

once confirm button hole is correct location. Punch hole can proceed.

This where we add the trade mark inside project

How to apply cream on inner surface to smoothen the edge portion. Use a paper edge as guide when applying burnishing cream. Hence only selected area is covered by cream

Add a small leather piece to cover both button surface


Burnishing the front layer edge before assemble this part


To remove unwanted surface before apply glue to contact area.


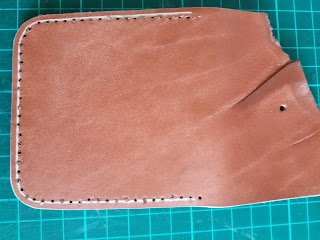
Punch hole along the "drain' line.


Preparing for stitching after punch hole


This coin purse have customize with
stamping done of end user initial.


= = =  end of document = = =


Stitching PONY tool

  Second version of pony stitching tool.

      This is a home make pony stitching tool to help the make leather work more enjoyable and less stressful for small and big project.

This is consider a very useful tool acting as a "third hand" for leather work. There is great difference in your stitch work result and outcome with this great tool.


This is a home make mini version of stitching pony tool.

You will notice there is two plastic conical cup at both side. This is to minimize the thread get stuck on the screw and knob during stitching process. This issue is more prominent for big project with long thread used.

Mistake encountered when fabricate Pony stitching tool.
1) The inner layer is too long, hence certain project might encounter difficulty to hold project part.

2) The gap between facing part is very limited, thicker material project might face issue to open jaw wider.

3) The jaw facing parts is to long, hence certain small project it might encounter difficulty to grip project.

4) Need to improve on the jaw to have leather surface to minimize scratch mark from wooden surface to project leather.

5) The spring tension is a bit difficult to open up, it is tighter for bigger gap on jaw.

** refer to new pony stitching tool (Related post - Stitching Pony Stand, dated 30 Oct 2018).

Coin purse design


This coin purse project is with two pouch, the inner pouch is using goat leather

Raw material for this coin purse, with two pocket and the edge are stitches with two colour thread. This sample dimension is for use as a guide and you can determine your the project size according to needs.


Trying new design of different coin purse, lining inner for the button and use two different colour thread.


Sharing project dimension it depend user needs to adjust according to your needs.


Stitches with two different colour for the edge


The flag is trimmed and the corner is rounded off.


Preparation for punch hole for stitching the coin purse

Preparing to glue all materials
How to start stitching use two colour thread


Add button and prepare to punch hole

End of document  πŸ‘΄

Year 2024 HAPPY Winter Solstice

 Year 2024 HAPPY Winter Solstice * Note: This is trail use of "Google Translate" application from ENGLISH to JAPANESE, sorry if th...