Leather Project # 7 (Belt 35mm Improvement) - レザープロジェクト#7(ベルト35mm改良)

             Leather Project # 7 (belt 35mm and Improvement) . レザープロジェクト #7 (ベルト35mmと改良) 。

A request from a relative with belt width 35mm, to add an anti slip loop and improvement to his belt.  ベルト幅35mmの親戚から、ベルトに滑り止めループを付けて改良してほしいという依頼。


Tools used for this project. このプロジェクトで使用したツール。

Thickness gage to check the nut and thread size can support this project.このプロジェクトで使用したツール。


Plan view of drawing to capture critical measurement for belt.  ベルトの重要な測定値を取得するための図面の平面図。
 。

Additional tools for project


Top view, with the anti slip strap holding the loop


Rear view of buckle


Front view with buckle wrap around with  leather layer that match width.


                                           End of document 👴👴👷 

Leather project #8 scissor sheath (new design with button) - レザープロジェクト #8 シザーシース(ボタン付きの新デザイン)

          Leather project #8 scissor sheath (new design with simple button)
レザープロジェクト#8 シザーシース(シンプルなボタン付きの新デザイン)。

    After several round of designing a few scissor sheath, majority with button strap.  Now try out new idea on scissor sheath without strap to keep scissor in place.
数回にわたってハサミの鞘を設計した後、そのほとんどはボタンストラップ付きでした。今度は、ハサミを所定の位置に保つためのストラップなしのハサミの鞘という新しいアイデアを試します。

    Introduce and use VT2 button size to hold the scissor in place.
Hence make use of the scissor nut and bolt head to keep it in position. As the protrusion make a idle way to restrict movement and minimize scissor from dropping off sheath.
VT2 ボタン サイズを導入して使用し、ハサミを所定の位置に保持します。
したがって、ハサミのナットとボルト ヘッドを使用して、所定の位置に保ちます。突起がアイドル ウェイを作成するため、動きが制限され、ハサミが鞘から落ちるのを最小限に抑えます。

Past post related to scissor sheath are
1) Leather project #6 Scissor sheath                 
date 18th Oct 2019

2) Leather project #5 Scissor sheath PART #4 (Friend's scissor sheath try out)  

date 29th Dec 2019
           
3) Leather project #5 Scissor sheath PART #3 (Friend's scissor sheath try out)      
date 9th Sept 2019

4)  WET Form Leather project #4 Scissor sheath   

date 15th July 2019
               
5) WET Form Leather project #3 Scissor sheath  
date 24th Dec 2016

シザーシースに関連する過去の投稿は
1) レザープロジェクト #6 シザーシース
日付 2019 年 10 月 18 日

2) レザープロジェクト #5 シザーシース PART #4 (友人のシザーシース試用)
日付 2019 年 12 月 29 日

3) レザープロジェクト #5 シザーシース PART #3 (友人のシザーシース試用)
日付 2019 年 9 月 9 日

4) WET フォーム レザープロジェクト #4 シザーシース
日付 2019 年 7 月 15 日

5) WET フォーム レザープロジェクト #3 シザーシース
日付 2016 年 12 月 24 日

Select a suitable leather size ,thickness , colour and verify it meet the requirement.
適切な革のサイズ、厚さ、色を選択し、要件を満たしていることを確認します。


Top view with scissor at it resting position on center of leather.
はさみが革の中央に置かれている上面図。

Updated 8th April.

This is how the inner layer are constructed, the white layer is a paper base hard paper.

Tips: the white hard paper is to engage with the step of scissor (close to the nut/thread). This is to minimize tips of scissor reaching the tip of sheath.
4 月 8 日に更新されました。

これが内層の構成です。白い層は紙ベースの硬質紙です。

ヒント: 白い硬質紙はハサミの段 (ナット/ねじに近い) にかみ合います。これは、ハサミの先端が鞘の先端に到達するのを最小限に抑えるためです。


Updated 8th April.
Close up view of the inner sheath

Updated 8th April.
This how I wrap the inner sheath with a outer leather layer.

More close up view

Take the hard paper
You will notice I use the inner layer with one end of the edge to prevent scissor protruding too deep hence act as a "stopper".


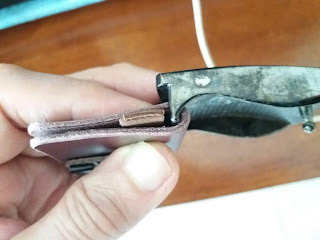
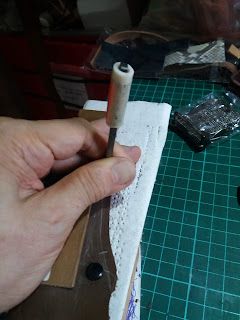
Add button accessories, use a hand press with proper VT2 punch set


TIPS :  to ensure punch hole are in alignment, use a straight edge to assist.

Punch hole before stitching start.

Close up view on the tip, it better to start from tip area , forward and backward three or four step

Stitching the tip toward handle of scissor.


End product of project

Update on 9th June 2024

this is how it define length of scissor.  It show which part is used more often compared to other cutting edge
This is how it define length of scissor. 


photo taken from You Tube  video  - What size scissor should I buy?  By Nagamaki Shears -  -  1,793 views  24 Sept 2023


First view


Second view

To remove scissor pull tag off and press the sheath edge with your thumb.


                              End of document 👴👲👷

Leather Project # 7 (Belt trimming)

Leather Project # 7 (Belt trimming) 

A friend request to shorten her two belt,
 a) About 20 mm width and another is 
b) width 30 mm).

1. OROTON genuine leather – 20mm, 108cm length

2. Quelli Della Pelle hand made in Bellagio Italy – 30mm , 104 cm length


Tools use to trim off excess leather of belt ( Quelli Della Pelle hand made in Bellagio Italy ) .
Note:- top right side is the cut off material to be use for making key chain.

This repair is quite straight forward as it involved in removing a rivet. Next trim the leather and reinsert and punch hole and add a Chicago Thread and Nut.


(15th March 2020) Update with more photo 


Tools for making key chain.


1. Quelli Della Pelle hand made in Bellagio Italy – 30mm , 104 cm, trim off about 2.25 or 5.72 cm
 This is straight forward task, remove a rivet and replaced with a Chicago screw and nut.

2. OROTON genuine leather – 20mm, 108cm trim off about 2.25 or 5.72 cm
This one a bit challenging it need to skive the end piece.


Use special knife to remove excess leather and reduce thickness required.


Use thickness gage to check the original thickness and use skive machine to trim to required thickness


A request from end user to save the cut off piece and make into small key chain.


Rear view of cut off leather belt to be use to make simple key chain for friend.

Front view of cut off leather belt.


 Fabricate a simple key chain with cut off leather and additional leather to compliment.


Use a awl to punch to match with original leather holes.
This is to minimize additional hole and also to ensure alignment.

Apply glue before stitching.


Add simple hook and small key ring

Both key chain is very simple design and both added a "D" ring to hold hook or small key ring.


                                                 End of document 👴👴

Man shoe repair (stitching sewing) - 男性靴修理(ステッチ縫製)

 This is about my own shoe repair for the outer sole separated... This is a Clarks - Gore-tex . これは、剥がれてしまったアウターソールの靴の修理についてです。これは、クラークスのゴアテ...